 The Good Sign Company
Portable Lighted Sign Packing Guide
How to Choose hook-and-loop cable ties for portable lighted signs
A reusable tie can keep a disconnected sign cord together between events without turning the cable into a tight knot. The useful choice comes from the measured bundle, the tie's complete dimensions, and the way the cord and adapter fit the sign case—not from pack quantity alone.
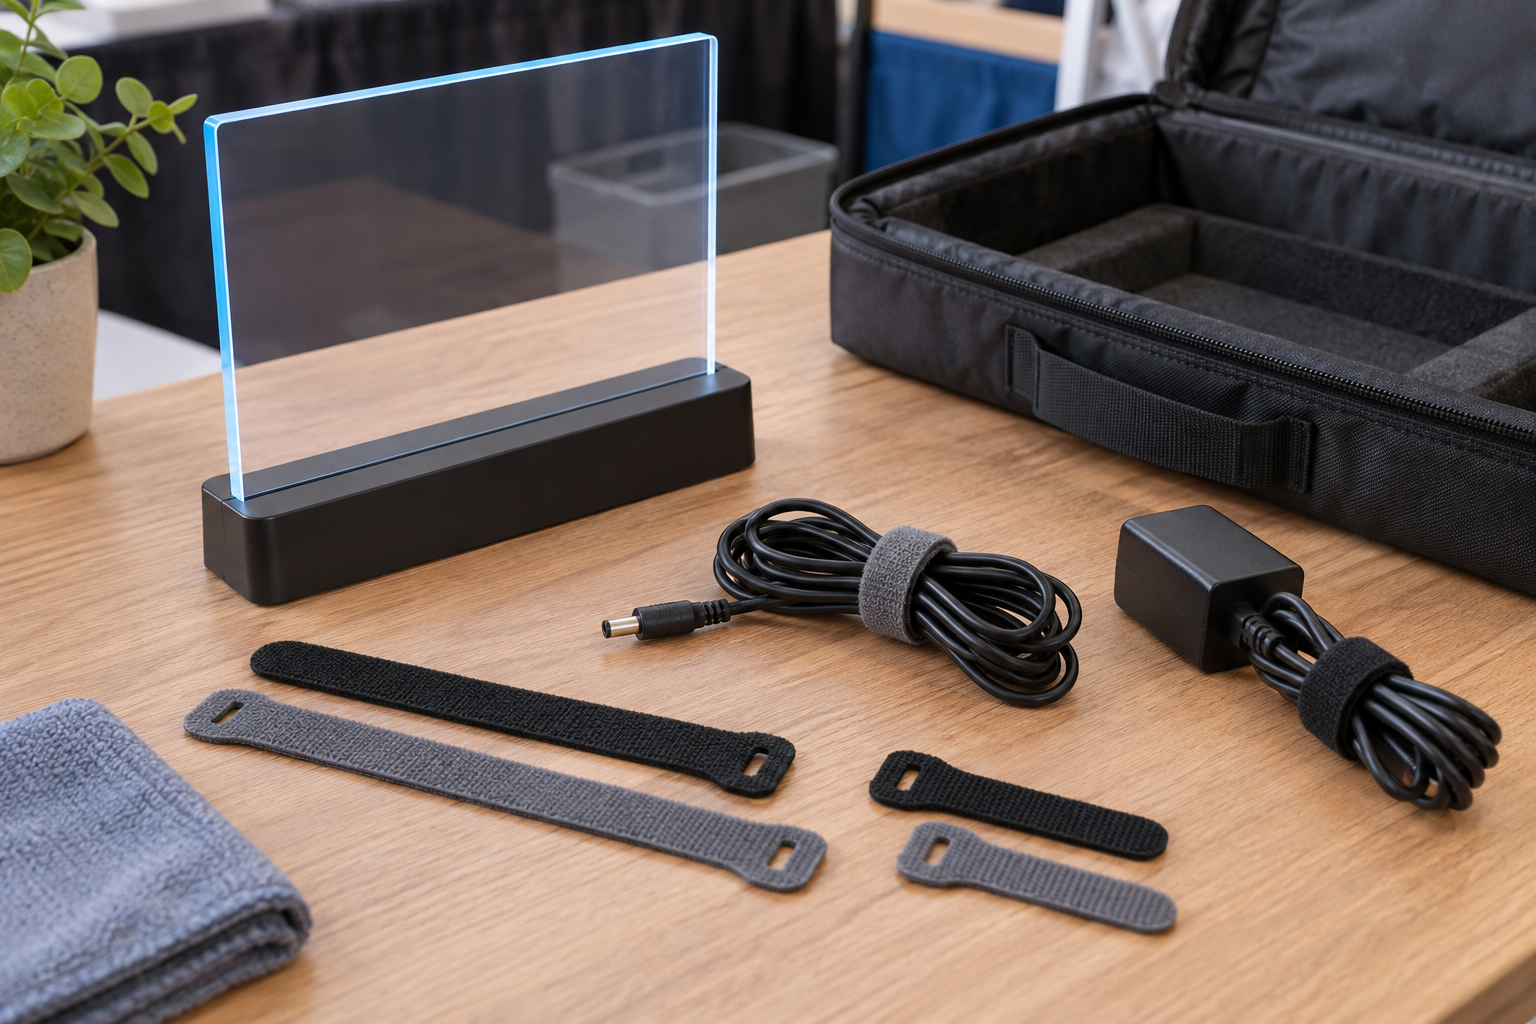
Format comparison
Match the tie to the packed cord bundle.
Unplug the sign, form the cord into the loose shape its maker recommends, measure that bundle, and compare the tie's usable length, width, attachment method, and release tab.
The short answer
- Choose an attached-loop tie when the tie should remain captured on one cord during setup and pack-down, provided it does not obstruct a connector or control.
- Choose a removable strip when the same tie set needs to serve different cables or the equipment maker wants the cord stored with nothing attached.
- Choose a writable or color-coded tie when several similar sign kits travel together and identification helps the team return each approved adapter and cord to the right case.
- Skip cable ties when the cord is damaged, unusually warm, tightly bent, or the sign maker provides a different storage method.
These are category-level selection criteria, not named winners or hands-on test results. Product dimensions and instructions can change, so check the current listing and maker guidance before buying.
Compare the main reusable tie formats
| Format | Useful starting fit | Verify before buying | Main tradeoff |
|---|---|---|---|
| Slotted attached-loop tie | One tie assigned to one removable sign cord | Attachment opening, usable length, tab clearance | Can snag or obstruct controls if placed carelessly |
| Removable double-sided strip | Shared kit with changing bundle sizes | Total length, overlap needed, edge finish | Easy to misplace during setup |
| Wide reusable strap | Larger adapter-and-cord group when maker guidance permits joint storage | Usable length, width, bundle shape, case clearance | May be excessive for one thin cord |
| Label-ready or color-coded tie | Multiple similar sign kits packed by a team | Label method, color plan, legibility after reuse | Identification only works when the system is maintained |
| Pre-sized reusable band | A repeatable bundle with little size variation | Supported bundle range and release method | Less flexible when the packed arrangement changes |
Seven checks that matter
- Start with the equipment guidance: follow the sign and power-supply makers' shutdown, disconnection, cooling, and cord-storage instructions.
- Measure the loose bundle: form the cord without pulling, twisting, or forcing small loops. Measure around the bundle where the tie will sit.
- Compare usable length: the advertised overall length may include a tab or attachment section. Look for enough working overlap without excessive tail.
- Choose width deliberately: a wider tie spreads contact over more jacket area but takes more case space. A narrow tie may suit a small cable only when it does not create a tight pressure point.
- Check the attachment style: decide whether the tie should stay on the cord or come off completely. Keep any captured tie away from plugs, strain relief, inline controls, and ventilation.
- Plan identification: when several setups look alike, label the case and tie consistently rather than relying on color memory alone.
- Inspect before every pack: retire worn ties that no longer hold reliably, and stop using any cable or adapter with visible damage or abnormal heat.
A pack-down workflow
- Switch off and unplug the sign according to its instructions, then allow any required cooling time.
- Disconnect only the components the manufacturer intends users to disconnect; never pull on the cable jacket.
- Inspect the cord, plug, connector, controls, adapter, and strain-relief areas in good light.
- Form a loose bundle using the cord-storage shape and minimum bend guidance provided for the equipment.
- Measure the finished bundle, choose a compatible tie, and fasten it only firmly enough to keep the loops together.
- Place the bundle where the case does not crush it against the sign, connector, adapter, or closing hardware.
- At the next setup, remove or release the tie fully before energizing the sign; do not operate the equipment with unused cable tightly coiled.
A reusable tie organizes a disconnected cable for storage. It does not repair damage, replace strain relief, establish electrical suitability, or make an energized coil safe.
Who should skip reusable cable ties?
- Skip any tie that requires a sharp bend, compressed jacket, strained connector, or bundle smaller than the equipment maker permits.
- Skip joint bundling when the sign maker says the cord, controller, and power adapter should be stored separately.
- Do not wrap a tie around a damaged, frayed, cut, flattened, discolored, or unusually warm cable. Stop using the equipment and follow the maker's support guidance.
- Do not treat a tie as a repair, strain-relief device, hanging point, or way to suspend an adapter.
- Skip an attached tie when it can block ventilation, a switch, an inline control, a plug, or the connector release.
- Skip this category if the storage case already has a properly sized cable compartment or retained strap that follows the equipment guidance.
- Do not leave excess cable tightly bundled while the sign is operating; set up the cord as the equipment instructions require.
Final buying checklist
- Sign and power-supply storage instructions reviewed
- Loose packed bundle measured around its actual path
- Usable tie length and required overlap confirmed
- Width and edge finish suitable for the cord jacket
- Attached-loop or fully removable format chosen deliberately
- Connector, strain relief, controls, and ventilation remain clear
- Case compartment closes without crushing the bundle
- Labeling plan defined for multi-sign kits
- Damaged or heat-affected cords removed from service
Reusable hook-and-loop ties fit transport and storage, while clips fit an in-use surface route. Compare a cable tie with an adhesive cable clip when the job is not yet settled. For a broader view of powered-sign hardware and placement, continue to sign mounting and setup supplies; for the sign itself, use the custom light-box planning guide.