 The Good Sign Company
Shelf-label attachment comparison
Hook-On Shelf Label Holder vs Adhesive Shelf Label Holder
Choose the attachment before the label style. A hook-on holder must match the shelf lip closely enough to seat as its maker intends; an adhesive holder needs an approved, prepared surface and a removal plan. The right choice depends on the actual fixture, how often shelves move, and who maintains the labels.
Disclosure: As an Amazon Associate, we may earn from qualifying purchases and approved partner referrals.
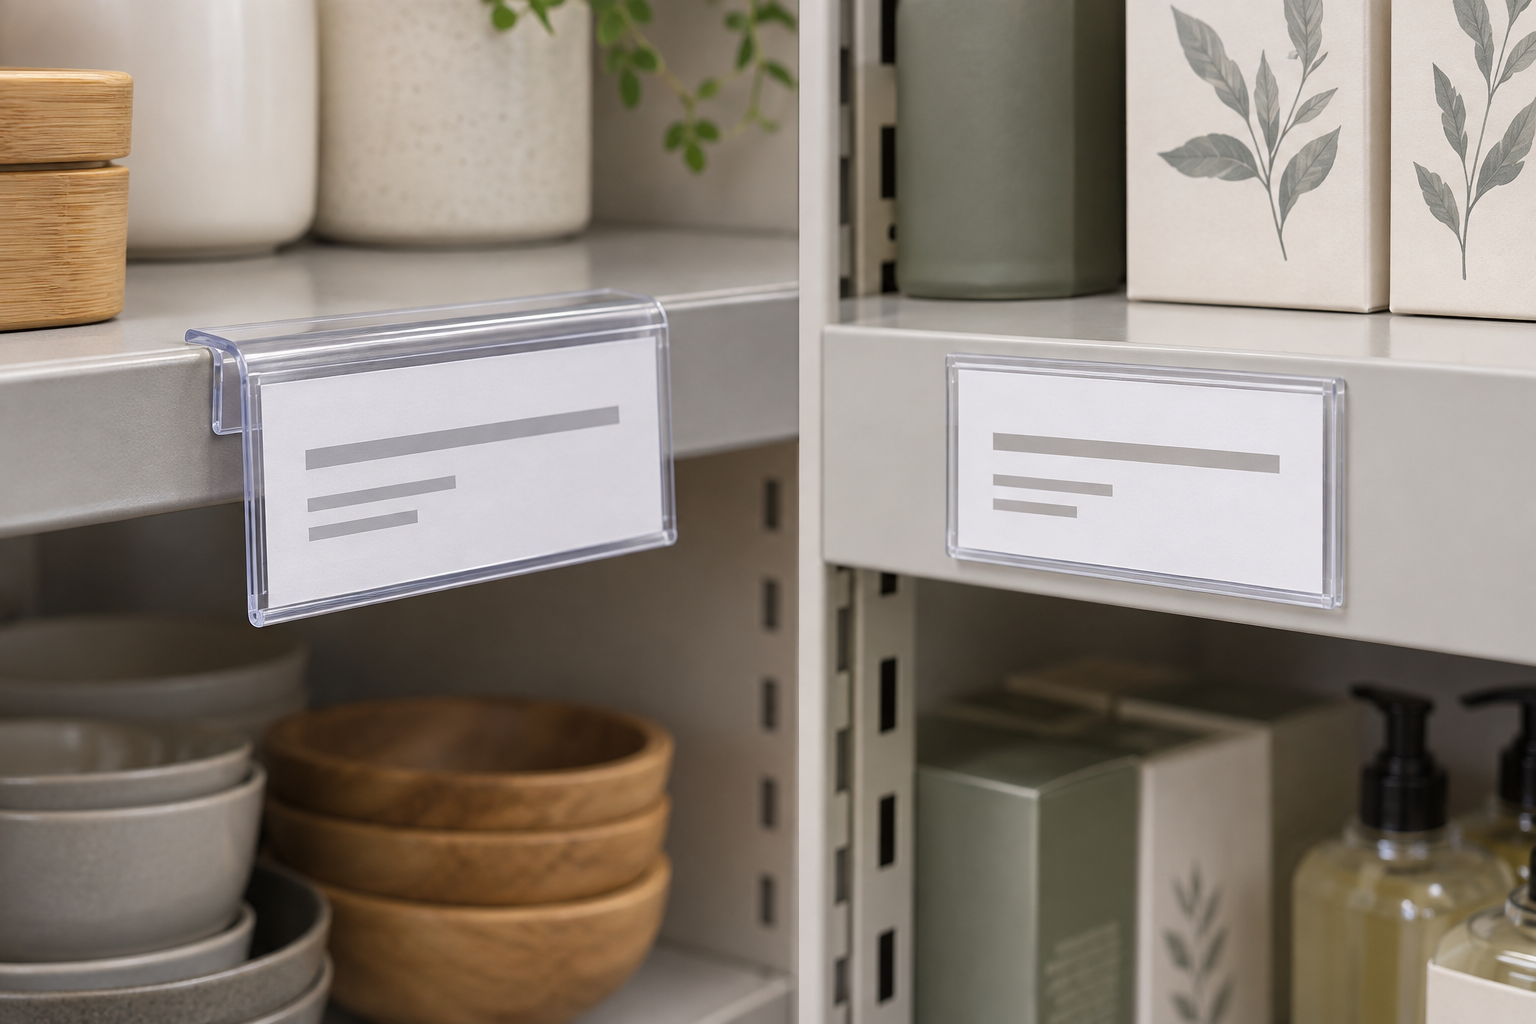
Compare the attachment details first
Measure the real shelf edge and finished insert. For adhesive products, also check the maker's approved surfaces, preparation steps, application conditions, and removal directions before buying.
The short answer
Choose a hook-on holder when the shelf has a measurable lip that matches the product's documented profile and labels may need to move with changing shelf layouts. The mechanical attachment can reduce surface commitment, but it is useful only when the hook geometry, loading access, and installed projection all fit.
Choose an adhesive holder when the shelf face is smooth, within the maker's stated surface guidance, and the label position is likely to remain stable. It can sit flat on an edge that has no usable hook profile, but initial alignment, surface preparation, removal instructions, and any finish cautions matter.
Choose neither when you cannot verify the host fixture, when the label would interfere with stock handling, or when the shelf maker offers a compatible rail or insert system. A magnetic holder may be another route only after the exact location passes a magnet test.
Decision table
| Decision | Hook-on holder | Adhesive holder |
|---|---|---|
| Required host | Shelf lip or edge matching the stated hook profile | Surface included in the maker's application guidance |
| First check | Measure edge thickness, shape, depth, and obstructions | Identify the surface and read preparation and removal directions |
| Rearrangement | May move among edges with the same compatible geometry | Best considered position-specific unless the maker says otherwise |
| Setup work | Seat the hook correctly and confirm insert access | Clean, align, apply, and allow any stated set time |
| Surface commitment | No bonded attachment, but contact can still affect a finish | Bond and later removal must be evaluated for the exact surface |
| Common mistake | Buying by label size without checking the hook cross-section | Assuming “removable” means suitable for every coating |
1. Trace the shelf-edge geometry
Measure more than the shelf's visible height. Sketch the edge in profile and record its thickness, any rolled lip, price channel, seam, trim, or return underneath. Then compare that shape with the holder maker's dimensional drawing or compatibility notes. A hook that fits a thin straight lip may not seat over a rounded, doubled, or recessed edge.
Check the installation path as well. Some holders press straight over an edge; others slide on from an open end. Uprights, neighboring shelves, dividers, and merchandise can block that movement even when the nominal dimensions appear compatible.
2. Evaluate the adhesive surface
For an adhesive holder, identify the shelf-face material and finish rather than calling it simply metal, plastic, or wood. Read the product instructions for compatible surfaces, cleaning method, application temperature, pressure, and any waiting period. Do not substitute a household cleaner or solvent unless the instructions allow it.
Plan removal before application. Review the specified removal direction and any cautions for paint, coating, laminate, residue, or refinishing. Test only where the fixture owner approves, especially on an older, delicate, or unknown finish. This guide cannot promise residue-free or damage-free removal.
3. Match the insert and loading path
Verify both the finished insert size and the visible area after the card is loaded. A top-loading pocket needs free space above; a side-loading pocket needs access at one end. Measure whether the shelf above, a divider, or stocked product blocks a complete insert change.
Use one full-size paper sample with the real type and trim marks. Place important text away from seams and covered edges. If staff update many labels, standardize the file size and loading direction so replacements do not require improvised trimming at the shelf.
4. Decide how often the layout changes
A frequently rearranged display may favor a compatible mechanical holder because the label can move with the category—but only if the destination shelves share the same edge geometry. Audit several fixtures instead of assuming a whole store, studio, pantry, or stockroom uses one shelf system.
An adhesive holder may fit a stable section where the label position remains useful through many insert changes. Moving the paper insert is different from moving the holder itself. Assign someone to maintain the template, print replacements, and inspect pockets when shelving is cleaned or reconfigured.
5. Check projection, cleaning, and daily handling
Measure the installed holder from the shelf face to its outermost edge. A projecting hook can snag stock, bags, carts, or hands if it extends into the normal handling path. A flat adhesive pocket can reduce projection, but its edges and loading opening still need clearance.
Follow the holder and shelf makers' cleaning instructions. Remove inserts when needed, keep liquid away from paper edges, and avoid forcing a hook sideways during cleaning. Replace a holder if its attachment or pocket no longer functions as intended; do not improvise extra tape or bend plastic without product guidance.
Who each format fits
- Hook-on fits: organizers or small retailers with documented, repeatable shelf-lip geometry and layouts that are rearranged often.
- Adhesive fits: stable shelf sections with a smooth approved face, no useful hook profile, and a planned application and removal process.
- A fixture-specific rail fits: larger label programs where the shelf maker provides a documented matching system.
- A freestanding or fixture-level sign fits: messages that must be read beyond the shelf rather than at close range.
When to skip each option
- Skip hook-on when the edge profile, installation path, or complete seated position cannot be verified.
- Skip adhesive when the surface is dusty, textured, delicate, recently finished, unknown, or excluded by the product instructions.
- Skip repositioning assumptions unless the maker documents that behavior; many adhesive products are intended for one application.
- Skip either holder when it blocks stock, cleaning, doors, drawers, or normal reach paths.
- Pause for fixture-owner review when the shelves are leased, managed by a property stakeholder, or governed by an internal merchandising standard.
Buying checklist
- Shelf manufacturer or fixture system, when known
- Edge thickness, shape, lip depth, and installation path
- Surface material, finish, and product compatibility guidance
- Finished insert size, visible area, and loading direction
- Complete installed projection and nearby clearance
- Adhesive preparation, application, and removal instructions
- Label-change frequency and responsible staff member
- Cleaning routine and spare-insert storage
Continue the shelf-label decision
Use the sign mounting and setup pillar to compare attachment choices without assuming universal surface compatibility. If the shelf face is confirmed magnet-responsive, compare magnetic and clip-on shelf label holders by fixture geometry and projection. For open wire fixtures, use the wire-shelf sign clip guide to match the actual rod, jaw, card, and viewing angle.