 The Good Sign Company
Indoor Counter Holder Comparison
Clamp-on vs suction-cup sign holder: which attachment fits?
A clamp-on holder needs an exposed edge with the right thickness and enough clearance for its jaws. A suction-cup holder needs a compatible smooth, nonporous face with room for the full cup. Decide from the actual counter or partition—not from the card holder above it. This guide covers lightweight indoor displays and does not establish a product's load limit or suitability.
Disclosure: As an Amazon Associate, we may earn from qualifying purchases and approved partner referrals.
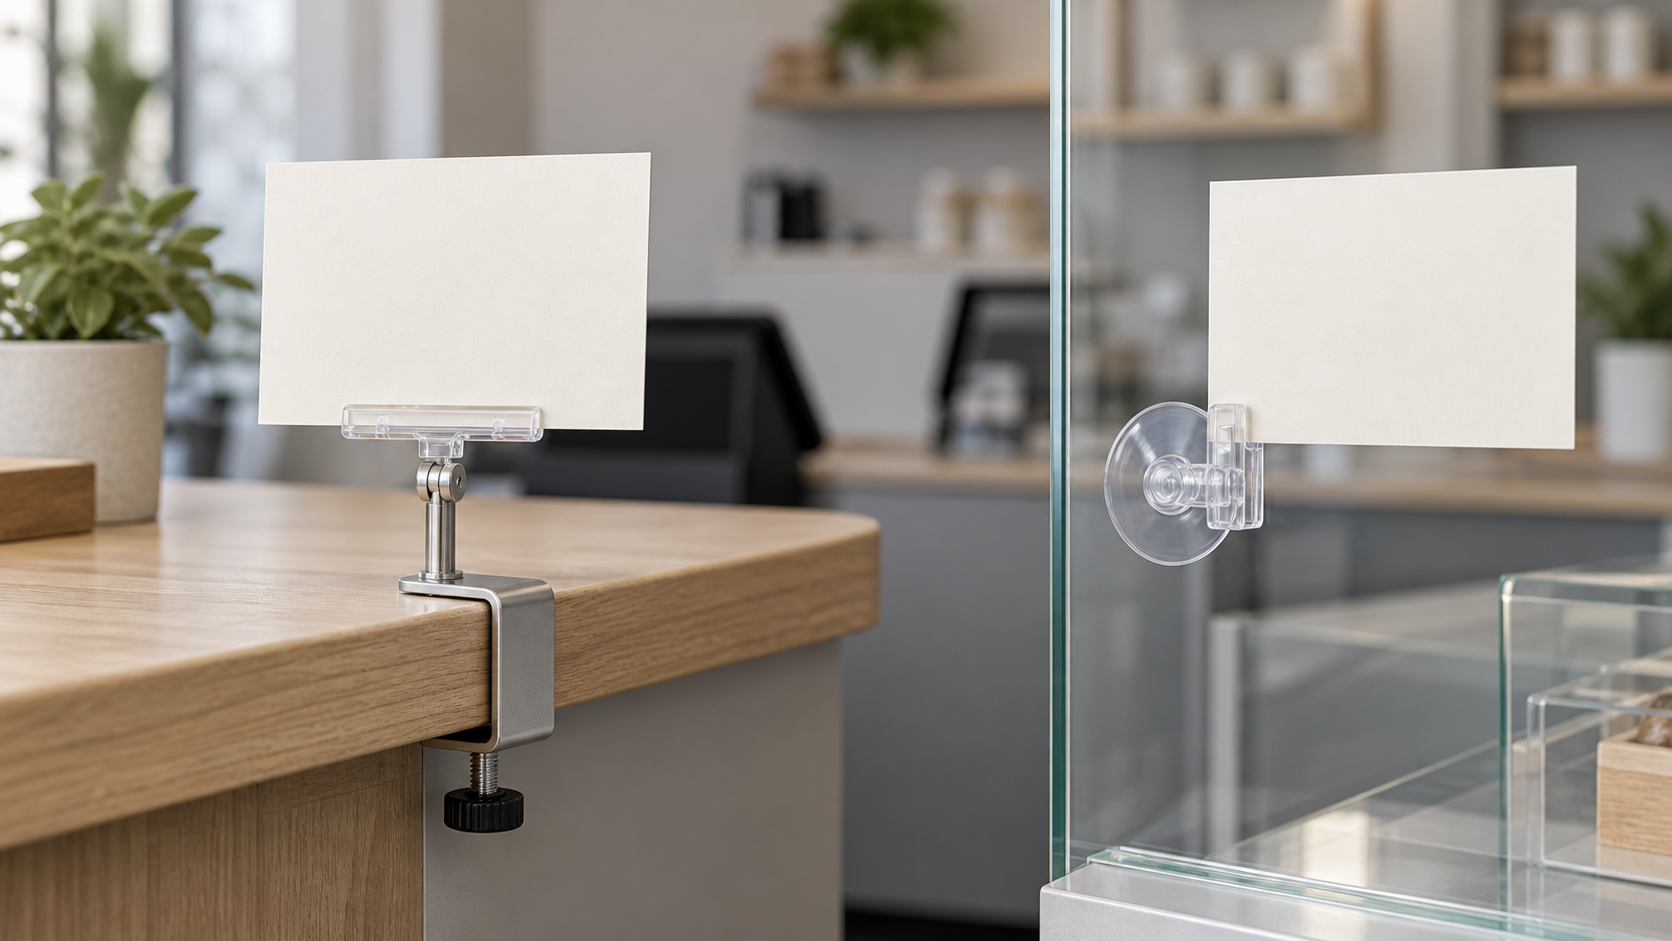
Compare both attachment formats
Measure the mounting surface before the sign card.
Record edge thickness and jaw clearance for a clamp, or identify the exact smooth face and cup diameter for suction. Then check the complete holder, card, and approach sightline.
The short answer
- Choose a clamp-on holder when there is a rigid, exposed edge within the holder's documented jaw range and the screw, pad, or jaws can sit without obstructing drawers, doors, knees, or service work.
- Choose a suction-cup holder when the message belongs on a compatible smooth indoor face and the maker documents the surface, cup, card, and attachment arrangement you need.
- Skip both when the available surface is textured, curved, delicate, moving, inaccessible for routine checks, or missing the dimensional guidance needed to confirm fit.
Start with attachment geometry
A clamp needs an edge and clearance
Measure the edge thickness at the exact attachment point. Then inspect what is above, below, and behind it. A countertop lip may look usable from the customer side but hide a cabinet rail, drawer, trim piece, or rounded underside that keeps the jaws from seating as the instructions show. Confirm the listed jaw opening, pad shape, tightening method, and intended surface from the current manufacturer information.
A suction cup needs a compatible face
Identify the surface rather than calling it simply “glass.” Check the manufacturer's compatible-surface and preparation instructions, along with the cup diameter and any lever or locking clearance. Seams, coatings, texture, curvature, and nearby edges can change whether the cup can make the contact the product requires. Do not assume a cup shown on one smooth surface is suitable for every partition or display case.
Tradeoffs that change the decision
Sign position and approach
A clamp typically projects from an edge; a suction cup places the support on a face. Mock up the final card and view it from the customer's real approach. Check whether the card blocks merchandise, a payment display, a staff sightline, or information on the opposite side of clear glass.
Complete clearance
For a clamp, include the handle or tightening knob beneath the counter and the arm above it. For suction, include the entire cup, release tab, card clip, and the hand space needed for installation and removal. Test cabinet doors, pass-through openings, cleaning tools, and routine hand movements around the holder.
Card size and leverage
Verify the supported card dimensions, thickness, orientation, and any documented complete-system limit. A larger or taller card changes the assembled profile even when it fits the clip. Do not infer holding ability from the appearance of a thick clamp, a large cup, or a short product demonstration.
Adjustment and repeated setup
Some holders add stems, pivots, or flexible arms. Confirm the current adjustment method and included pieces, then count the steps needed to reproduce the same angle. If the display travels, protect cups, pads, threaded parts, clips, and cards from deformation or loss; keep maker care instructions with the kit.
Cleaning and inspection
Follow the holder and surface makers' preparation, cleaning, and removal directions. Check both formats on the schedule recommended for the product and whenever the surface, card, or location changes. Replace or stop using parts that no longer match the documented setup rather than improvising a stronger hold.
A practical counter test
- Print the longest normal message at final card size.
- Mark the exact location and photograph the edge or smooth face straight on and from the side.
- Measure edge thickness and surrounding jaw clearance, or the uninterrupted smooth area needed for the cup.
- Compare those measurements with current manufacturer dimensions, compatible surfaces, included parts, card capacity, and instructions.
- Install one holder exactly as directed and view the message from each customer approach.
- Run normal counter tasks—opening storage, taking payment, passing products, cleaning, and changing the card—without forcing the holder out of the way.
- Remove and reinstall it once, following the instructions, before buying a larger quantity.
Skip criteria and alternatives
- Skip the clamp if the edge is outside the documented jaw range, rounded or obstructed where the jaws need contact, or the tightening hardware intrudes into routine use.
- Skip the suction cup if the maker does not list the surface as compatible, the face lacks enough uninterrupted area, or staff cannot reach it for the required preparation and checks.
- Use a tabletop base when neither attachment point is dependable but the counter has a measured free footprint; compare mounted and tabletop sign placement before choosing the holder.
- Use a wall or freestanding position when the counter is already crowded or the message must be read earlier in the customer path.
- Ask the property or fixture owner before attaching hardware to supplied surfaces. This article does not determine lease, landlord, accessibility, venue, or code approval.
Choose the next guide
If the known location is smooth interior glass, continue with the suction-cup holder buying framework. If a display edge is available but a self-standing base is still possible, use the clip-on versus weighted-base comparison. For small price or product cards on wire fixtures, compare sign clips for wire shelving and market racks. For the wider message, placement, and customer-path decision, use the small-business sign planning pillar.
Verdict
Choose by the available attachment surface. A clamp-on holder is the better candidate when a measured, unobstructed edge matches its current instructions. A suction-cup holder is the better candidate when a documented compatible smooth face puts the card at the right sightline. If either fit depends on guesswork, change the location or holder format before buying multiples.