 The Good Sign Company
Replacement Frame-Wire Guide
How to Choose picture-hanging wire kits for framed indoor signs
A replacement wire kit is only a sensible route when the frame is designed for frame-side attachment hardware and every component can be matched to the finished sign. Start with the frame maker's directions, the existing attachment geometry, the complete sign weight, and the wall-side setup—not the frame width alone.
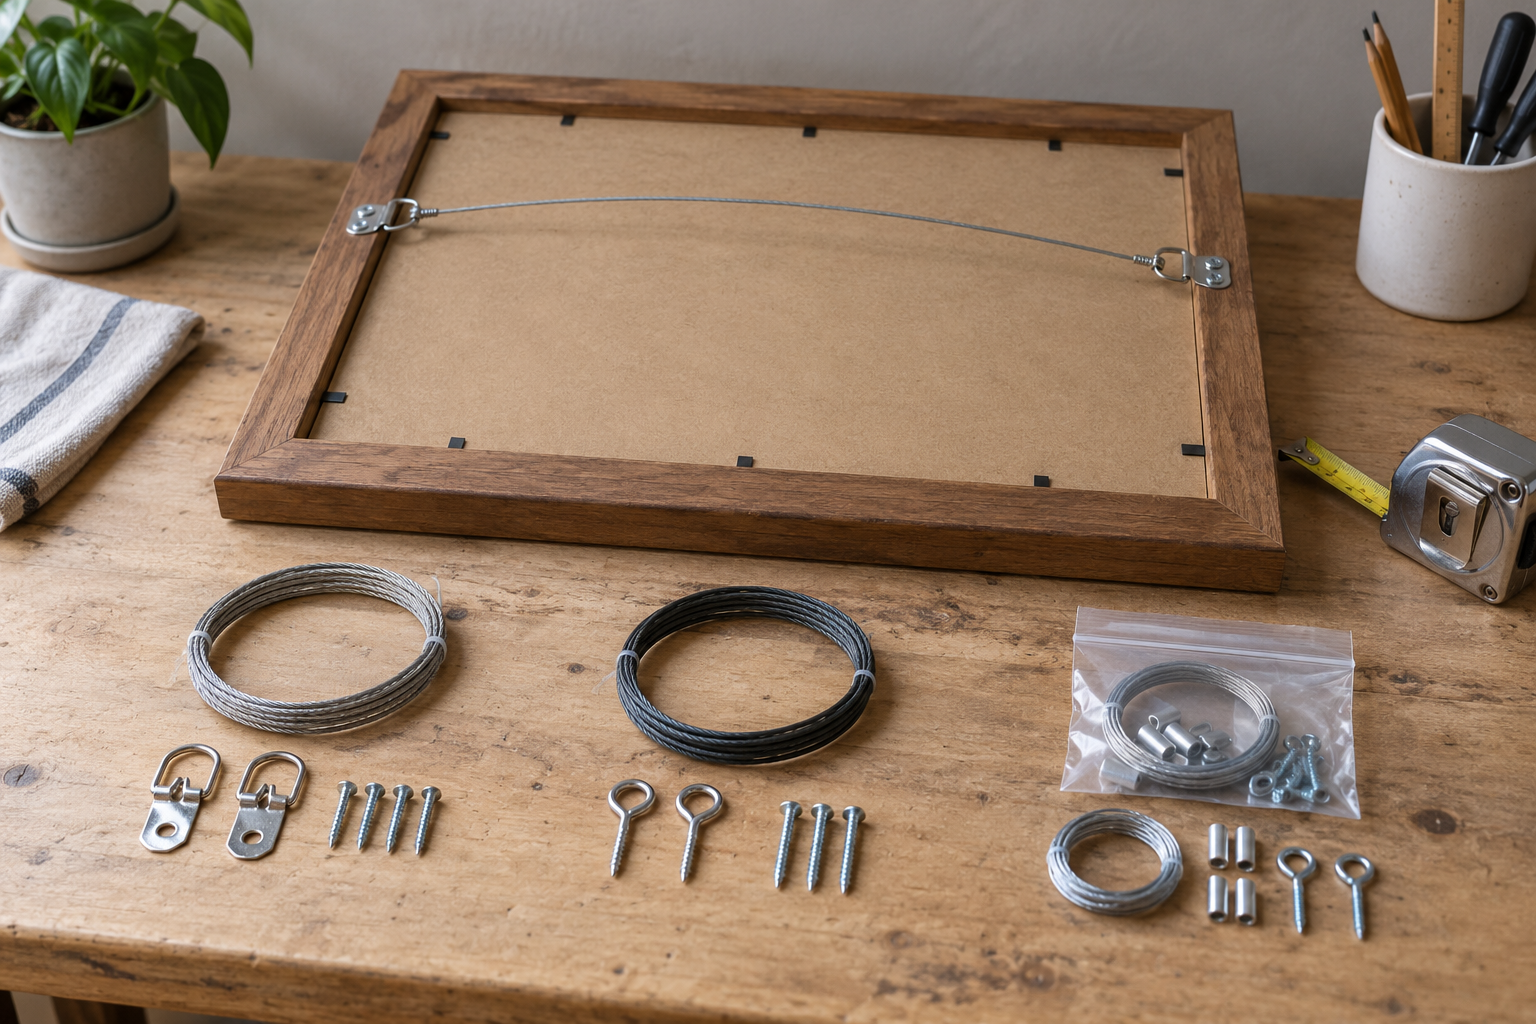
Format comparison
Compare kits only after documenting the frame.
Check the kit maker's supported frame construction, attachment hardware, wire type and dimensions, included fasteners, stated limits, and installation directions. A mixed assortment is not automatically a matched hanging system.
The short answer
- Choose a D-ring-and-wire kit only when its instructions support the frame rail, fasteners, finished weight, and intended attachment geometry.
- Choose a wire-only replacement when compatible frame-side fittings are already installed and the maker's wire specification can be confirmed.
- Choose a coated-wire option only after verifying that the coating, terminations, fittings, and instructions match the actual frame system.
- Skip a general kit when the frame has unknown, thin, cracked, hollow, valuable, or non-serviceable construction.
Three kit formats worth comparing
| Kit format | Starting condition | Verify before buying | Main tradeoff |
|---|---|---|---|
| D-rings, wire, and frame screws | A compatible frame with no usable fittings | Frame material and thickness, ring geometry, screw specification, wire match | Every included component must suit the same frame |
| Replacement wire | Existing compatible fittings remain sound | Wire construction and dimensions, connection method, stated limits, instructions | Does not correct worn or unsuitable frame fittings |
| Coated wire kit | The complete kit is approved for the frame | Finished diameter, termination method, fitting clearance, current directions | Coating changes diameter and does not establish system compatibility |
These are shopping categories, not tested winners. Current listings vary, so verify each component and instruction set before ordering.
Start at the back of the frame
Remove the framed sign from service and photograph the complete back. Record the frame maker and model when known, rail material, rail width and depth, corner joints, existing holes, backing board, artwork clearance, spacers, and any factory fittings. Do not assume a decorative molding or thin backing board can accept screws.
Weigh the finished assembly with glazing, art or sign face, backing, frame, and installed hardware. Keep that recorded weight separate from any general marketing label on the kit, then check the current instructions for every component in the proposed system.
Match the attachment points, not just the wire
A wire is only one part of the hanging path. The frame-side fittings, their fasteners, the frame rails, the wire terminations, the wall hook, the wall fastener, and the wall assembly all matter. A stated limit for one item is not a promise for the assembled display.
If fittings are already present, check them against the frame or hardware maker's inspection and replacement guidance. Do not reuse bent, loose, corroded, improvised, or unidentified parts simply because new wire fits through them.
Measure wire and clearance
- Wire construction and finished diameter: match the current directions instead of substituting craft wire or choosing by appearance.
- Attachment spacing: record the center-to-center distance and the vertical position on both frame rails.
- Wall-hook engagement: confirm the intended hook can capture the installed wire without rubbing the sign face or backing.
- Installed profile: mock up the expected wall gap and verify that fittings or wire will not show from normal approaches.
- Adjustment range: leave only the amount of wire shape and movement allowed by the kit instructions; do not improvise a termination.
Separate the frame-side and wall-side decisions
This guide stops at choosing a compatible frame-wire kit. The wall hook or fastener still has to match the wall assembly, the completed hanging setup, and current manufacturer instructions. Drywall, a located stud, plaster, masonry, tile, and paneling are not interchangeable mounting surfaces.
Make a full-size paper template and use the levels and layout-tools guide to transfer the final frame and mounting geometry. After the completed frame hangs securely, use the clear wall-bumper guide only for measured lower contact points; bumpers do not join the load path. Pause when the wall construction is uncertain or drilling could affect concealed services.
Who should skip a replacement wire kit?
- A frame whose maker excludes added or replacement hanging hardware.
- A frame rail with unknown thickness, weak joints, cracks, damage, or no documented attachment zone.
- A sign with valuable artwork, glazing, power, or components that a fastener could reach.
- An above-bed, above-seating, stair, overhead, public, or high-consequence position that needs project-specific assessment.
- An exterior, damp, code-sensitive, regulated, or large commercial sign project.
- Anyone who cannot verify a compatible complete path from the frame fitting through the wall attachment.
Final buying checklist
- Frame maker's directions and existing hardware reviewed
- Finished assembly weighed and back photographed
- Frame rail material, width, depth, joints, and attachment zone documented
- Wire construction, finished diameter, and termination method verified
- Rings, screws, and wire confirmed as a compatible system
- Wall-side hook, fastener, and wall assembly evaluated separately
- Installed profile and side visibility mocked up
- Inspection and replacement routine recorded
- Professional or alternate display route chosen when evidence is incomplete
The best wire kit is not the one with the most parts. It is the kit whose current instructions match the frame construction, fittings, wire, fasteners, complete sign, and intended hanging path without guesswork.