 The Good Sign Company
Frame Contact Accessory Guide
How to Choose clear wall bumpers for framed indoor signs
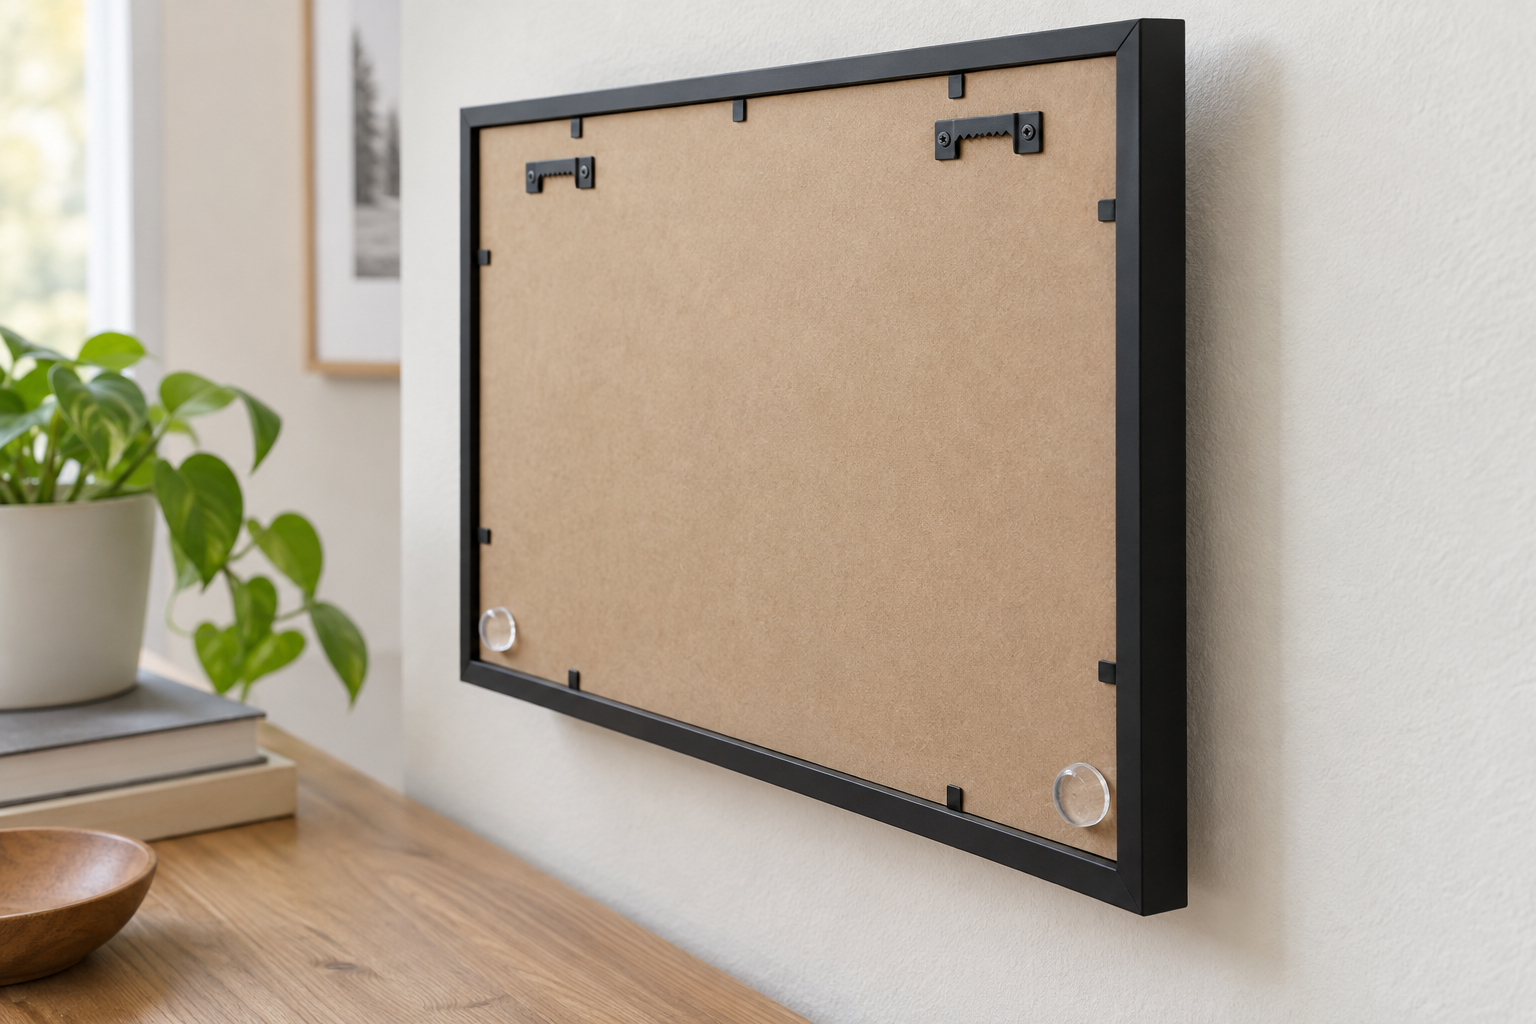
Clear bumpers can create replaceable contact points at the lower back corners of a framed indoor sign. They do not hang the frame, level it, or prove that the wall finish will remain unchanged. Choose them only after the frame is securely mounted and you have measured the actual contact surfaces.
Format comparison
Compare bumpers after measuring the frame-to-wall gap.
Check the listed diameter, installed thickness, material, adhesive instructions, approved contact surfaces, and removal guidance. Treat every bumper as a contact accessory—not mounting hardware.
The short answer
- Choose thin clear dots when the lower frame already sits close to the wall and only a small replaceable contact point is needed.
- Choose thicker domed bumpers only when a measured gap and the maker's surface guidance support that profile.
- Choose a larger diameter when it fits a broad, flat frame contact area without showing past the edge.
- Skip adhesive bumpers when either contact surface is rough, dusty, damp, damaged, freshly finished, valuable, or excluded by the maker.
Three bumper formats to compare
| Format | Useful starting condition | Verify before buying | Main tradeoff |
|---|---|---|---|
| Thin flat dot | A narrow, nearly even lower gap | Installed thickness, diameter, frame contact area | May be too thin for an uneven frame profile |
| Domed clear bumper | A measured gap needs a deeper contact point | Total height, compression guidance, edge visibility | More likely to be visible from the side |
| Sheet or multi-size assortment | Several compatible frames need documented sizes | Dimensions for every size, material, storage directions | An assortment can hide incomplete specifications |
These are comparison categories, not tested winners. Listings and instructions change, so verify the current product information before ordering.
Measure the contact geometry first
With the frame securely supported, inspect the back and identify the points that naturally approach the wall. Measure the flat area available at each lower corner and the gap with the existing hanging system settled. A bumper should land on a stable part of the frame—not loose backing paper, a rotating tab, glazing, artwork, a cable, or a protruding fastener.
Use equal bumper positions only when the frame construction is symmetrical. If the lower corners do not sit at the same depth, stop and diagnose the frame and hanging setup instead of stacking dots to improvise a correction.
Match diameter and thickness to the actual frame
- Diameter: keep the full adhesive face on a clean, flat frame surface and within the frame edge.
- Installed thickness: compare the listed profile with the measured gap; do not assume every clear dot has the same height.
- Material: use the maker's description and care guidance rather than treating “rubber,” silicone, vinyl, and polyurethane as interchangeable.
- Visibility: view the framed sign from the side and below before applying anything permanently.
- Replacement access: leave enough room to reach the bumper without prying against the wall or sign face.
Check both surfaces and the adhesive instructions
Read the bumper maker's current application, surface, temperature, cleaning, pressure, cure, inspection, and removal directions. Also check the frame finish maker's guidance. A clear bumper can still change appearance over time, and no generic dot can promise residue-free removal or wall protection.
Apply bumpers to the frame only when that is the documented use. Do not add adhesive directly to the painted wall simply to keep the frame from moving. If the wall or frame finish is unknown, choose a non-adhesive spacing approach approved for the complete display or leave the setup unchanged.
Keep the mounting system separate
Bumpers are not part of the load path. The frame-side hardware, wall hook or fastener, wall construction, and completed sign still need their own compatible plan. If the mounting decision is unresolved, compare picture-hanging hardware for wooden signs or document the wall with the levels and layout-tools guide before adding contact accessories.
Who should skip clear adhesive bumpers?
- Anyone trying to make a loose or unsuitable mount seem stable.
- A frame with no clean, flat, documented contact area.
- Fresh, delicate, textured, dusty, oily, damp, damaged, or unknown finishes.
- A valuable frame or wall finish where an adhesive test or future replacement is unacceptable.
- An exterior, wet, overhead, code-sensitive, regulated, or large commercial sign setup.
- A powered sign where bumper placement could affect wiring, ventilation, a power supply, or the maker's required spacing.
Final buying checklist
- Frame is securely mounted without relying on bumpers
- Natural lower contact points identified
- Flat contact area and frame-to-wall gap measured
- Bumper diameter and installed thickness documented
- Material and adhesive guidance checked
- Frame finish included in the maker's surface guidance
- Side visibility and replacement access reviewed
- Cleaning, application, cure, inspection, and removal steps recorded
- No wall-protection, leveling, residue, or load-support promise assumed
The best clear bumper is the smallest documented format that fits the measured frame contact area and gap, follows the maker's surface guidance, stays visually unobtrusive, and can be inspected or replaced without disturbing the hanging system.