 The Good Sign Company
Craft Booth Display Guide
Best pegboard sign holders for craft booths: match the hardware to the board and card.
A portable pegboard can keep prices, product categories, and short booth messages near the items they explain. The holder still has to match the board, support the finished card, stay out of customer reach paths, and pack without turning setup into a puzzle. This guide compares holder categories—not named winners or universally compatible hardware.
Disclosure: As an Amazon Associate, we may earn from qualifying purchases and approved partner referrals.
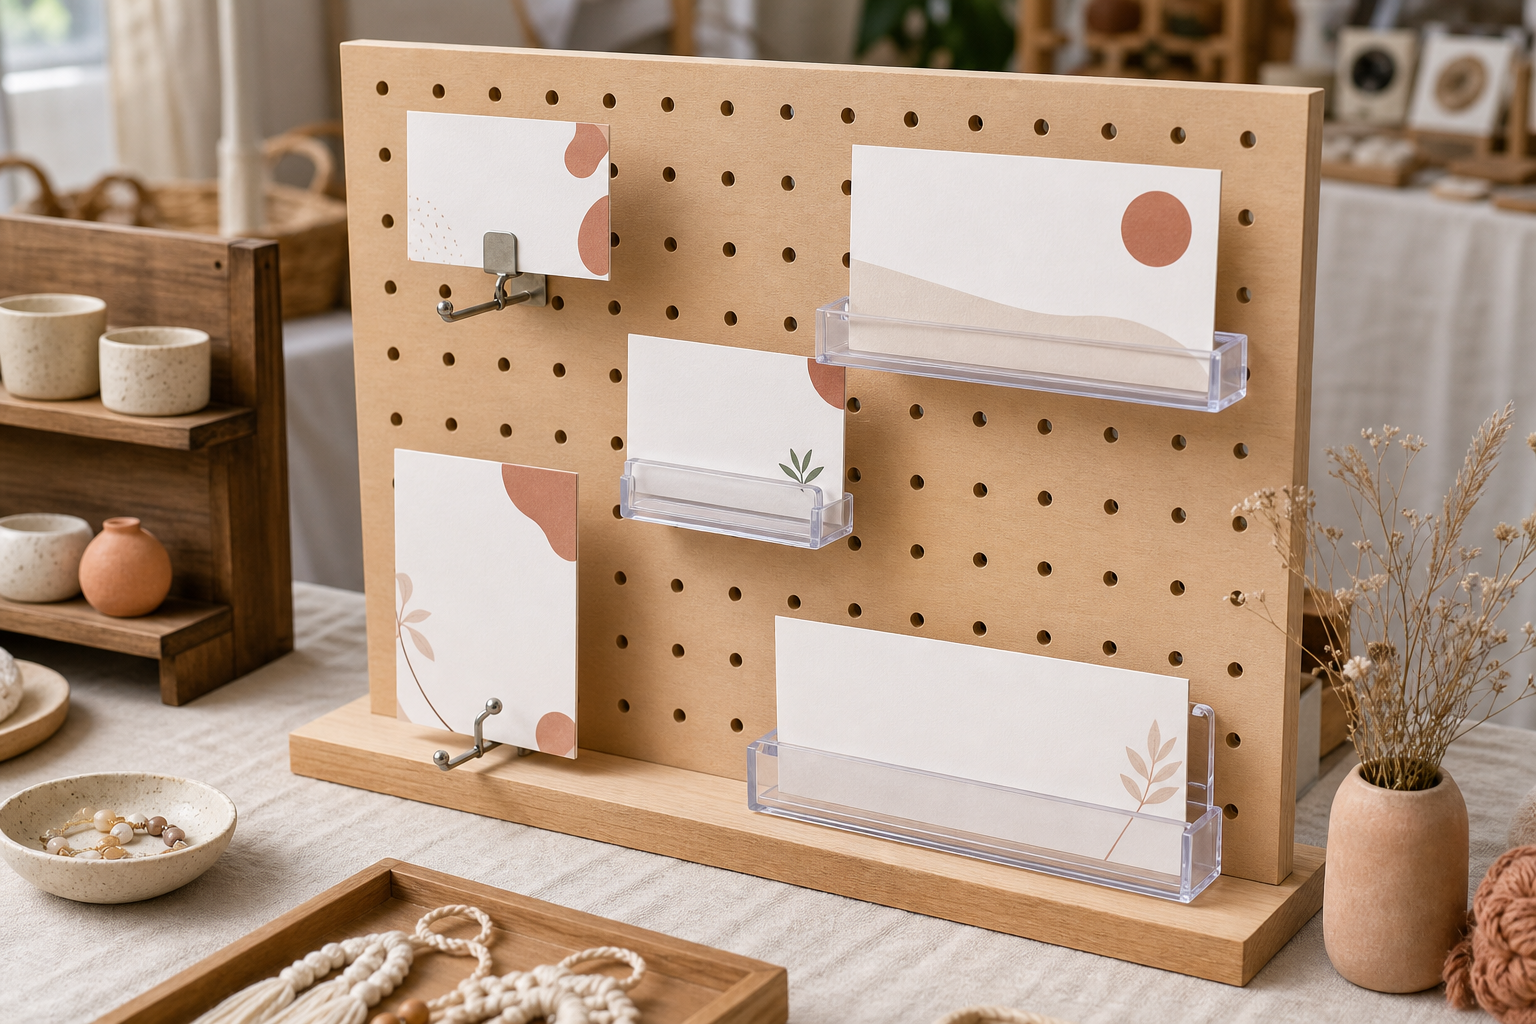
Category comparison
Shop only after measuring the board and finished cards.
Record the pegboard's hole spacing, hole diameter, panel thickness, and usable depth. Then verify each current listing's stated board compatibility, insert dimensions, attachment method, included parts, and use instructions.
Best Holder Categories by Booth Job
These are layout-based starting points, not hands-on rankings.
- Hook-and-card clip: best for a small card that moves with a product group. It can be quick to reposition, but the hook projects into the booth. Verify the hook geometry against the board and keep the card clear of customer and packing paths.
- Clear label rail or pocket: best for a tidy row of consistent cards. Use it when repeated prices or categories share one card size. Confirm the usable insert opening, attachment method, and whether the rail blocks nearby holes.
- Small shelf-front holder: best when the sign belongs to a pegboard shelf. Match the holder to the shelf edge or lip rather than assuming that every shelf accepts the same clip.
- Top-loading card holder: best for frequent paper changes. Leave enough clearance above the opening to swap the insert without unloading merchandise.
- Rigid plate or frame holder: best for one stable brand or category message. A larger face can improve hierarchy, but it uses more board area and may need more than one attachment point. Follow the maker's stated size and support guidance.
Selection Criteria That Matter
- Board compatibility: measure hole spacing, hole diameter, panel thickness, and clearance behind the board. Treat a listing's compatibility statement as essential, not optional.
- Finished card dimensions: measure the trimmed or laminated insert. Confirm both the visible area and the opening used to load it.
- Attachment and retention: compare hooks, clips, pockets, rails, or shelf-edge grips by the way they connect to the exact board or shelf. Do not infer holding capacity from a photo.
- Projection depth: measure how far the holder and card extend into the aisle or across merchandise. A deeper hook can improve separation while creating a snag point during shopping or packing.
- Readability: print the card at full size and view it from the customer approach. A holder cannot rescue cramped type or too many words.
- Rearrangement: count how often prices and product groups move. Choose a loading and attachment method that supports those changes without forcing a full display reset.
- Transport: decide whether holders remain attached or pack separately. Protect clear pockets and small clips from bending, scratching, or disappearing between events.
A Practical Comparison Framework
- Assign one job to each sign: price, category, short instruction, or brand cue.
- Print the proposed cards at full size and confirm that the message reads from the customer position.
- Measure the board holes, panel thickness, rear clearance, card size, and available display depth.
- Remove any option whose current listing does not clearly match the board and insert measurements.
- Mock up the holder position with merchandise in place; check blocked products, snag points, glare, and visual competition.
- Time one realistic price or layout change, then pack and unpack the proposed set.
- Before buying, verify current included parts, compatibility notes, and use instructions with the seller or manufacturer.
Use the small-business sign planning pillar to simplify each message and sightline. If the sign needs its own tabletop base, compare tabletop signs for vendor booths. For the pricing hierarchy itself, continue to price signs for craft-fair tables.
Who Should Skip Pegboard Sign Holders
- Skip this route when the board's hole pattern, thickness, or rear clearance is unknown and the listing provides no clear compatibility guidance.
- Skip projecting hooks where customers, bags, clothing, or staff are likely to brush them.
- Skip separate holders when one well-designed header or tabletop sign communicates the message more clearly.
- Skip tiny inserts when the necessary message cannot remain readable from the customer approach.
- Skip a holder that must be removed for every product restock if that adds avoidable setup friction.
- Do not treat this guide as venue, accessibility, load, safety, or code-compliance approval.
The Practical Bottom Line
Start with the exact pegboard and a full-size card, not the holder photo. The useful choice fits the documented hole system, supports the measured insert, keeps the booth's products and movement clear, and makes routine changes easy. When a listing leaves those facts vague, keep comparing. If the host fixture is not settled, compare pegboard and gridwall sign holders before buying hardware for either system.