 The Good Sign Company
Indoor Counter Sign Setup Guide
How to Choose non-slip pads for tabletop sign bases
The best non-slip pad matches both the sign base and the counter without making the display wobble. Compare pad thickness, contact area, attachment method, surface guidance, residue risk, cleaning needs, and the complete sign's balance. A pad may reduce ordinary sliding, but it does not make an unstable, oversized, or frequently bumped sign safe.
This guide covers small, unpowered tabletop signs used indoors on stable counters, desks, shelves, and vendor tables. It does not establish a load rating, protect every finish, or replace the sign-holder and pad manufacturers' instructions.
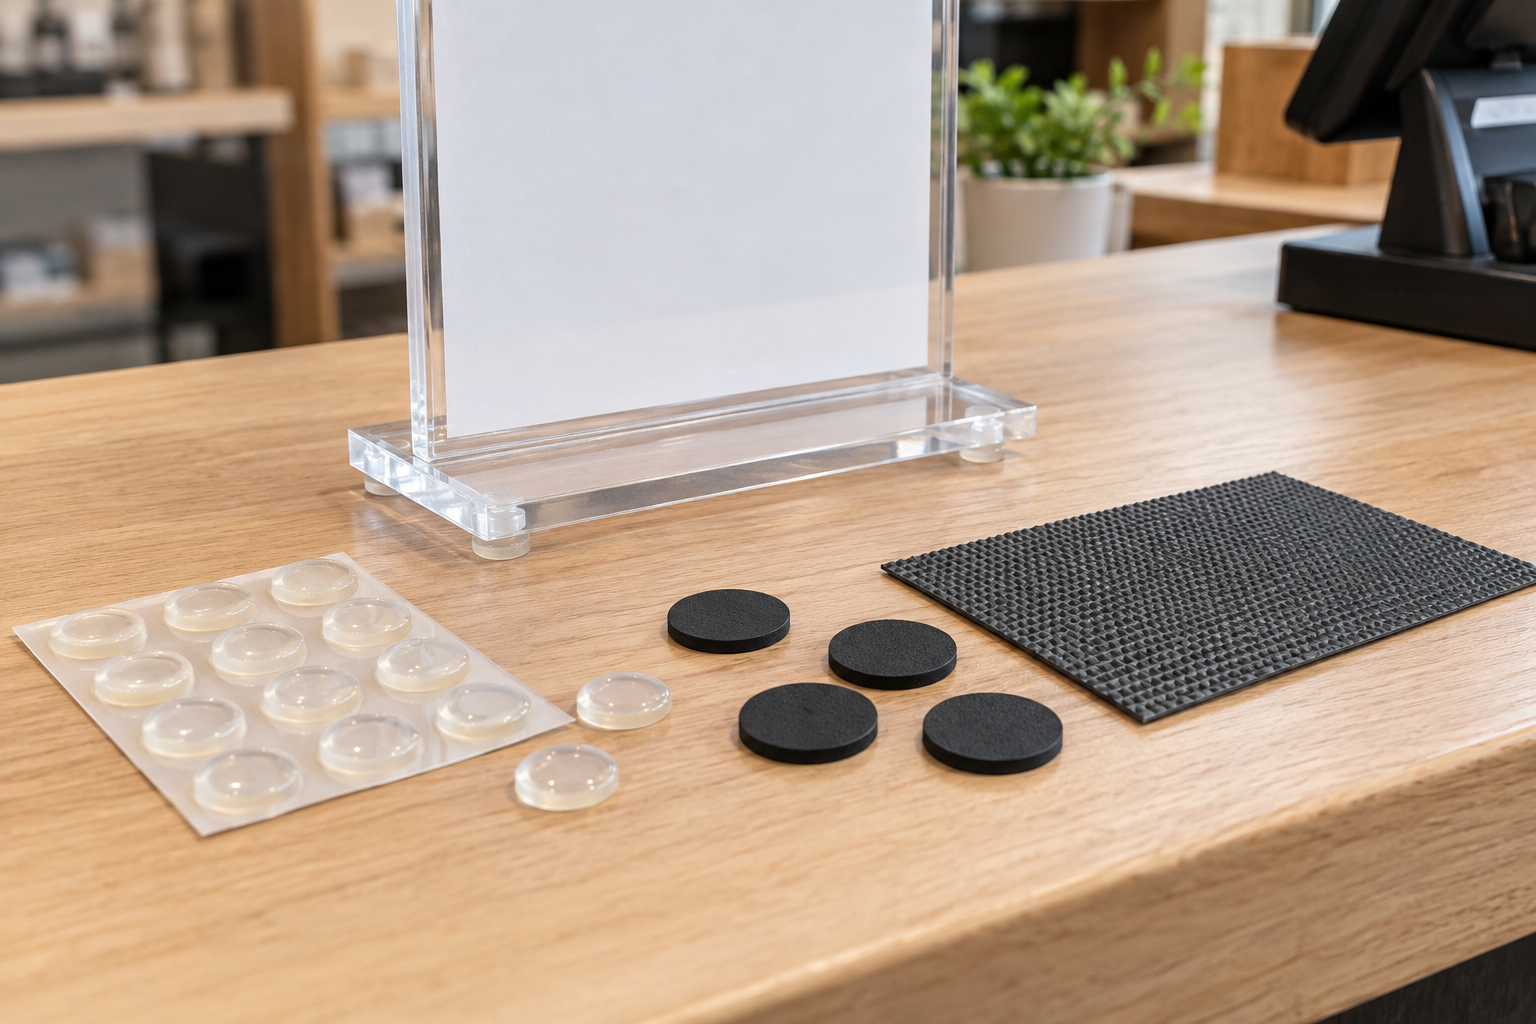
Category starting point
Compare pad dimensions and surface instructions
Measure the sign base's flat contact zones before shopping. Check current listings for pad diameter or sheet size, thickness, attachment method, compatible surfaces, cleaning directions, and removal guidance.
How to Choose pad formats by tabletop setup
These are use-based categories, not named winners or hands-on rankings.
- Clear silicone bumpers: best for small, visible contact points. Their compact shape can suit clear acrylic bases when the underside has several flat landing zones. Compare diameter, height, adhesive guidance, and whether four or more equal points will keep the holder level.
- Thin rubber pads: best for opaque bases with defined corners. Dark pads can disappear beneath metal, wood, or black plastic bases. Confirm that every pad has the same thickness and sits fully inside the base edge.
- Cut-to-size grip sheet: best for broad, flat base coverage. A trimmed sheet can spread contact across a larger underside without placing small feet individually. Check whether it attaches to the base or remains loose, and test whether the edge stays concealed.
- Removable non-adhesive mat: best for temporary counters and events. A loose mat avoids bonding a pad to the holder, but it creates a visible layer and another item to clean, label, and pack. Verify that the mat lies flat and does not extend into the work area.
Seven checks before buying
- Inspect the entire underside. Note ribs, feet, recessed areas, screws, seams, and the actual flat zones that touch the counter.
- Measure pad clearance. Record the maximum diameter, width, and thickness that fit without protruding or lifting the holder unevenly.
- Identify both materials. Write down the base material and the counter finish. Use only product guidance that addresses the intended surfaces.
- Choose attachment deliberately. Adhesive-backed pads stay with the sign but can leave residue or become difficult to reposition. Loose grip material is easier to separate but can shift or get lost.
- Protect the viewing angle. Mock up the proposed pad thickness with equal temporary spacers and check that the sign remains level and readable from the real approach.
- Plan cleaning. Confirm whether the pads can be wiped in place, must be removed, or need replacement when dust reduces grip. Keep cleaners within the counter and product maker's guidance.
- Test one assembled sign. Apply or place the pads as directed, load the real insert, and observe ordinary updates, wiping, customer flow, and staff contact before outfitting multiple holders.
Comparison framework
Choose point pads when the base has clear flat corners, the pad height can be matched, and keeping the grip material visually discreet matters. Choose a cut sheet when the underside is broadly flat and more continuous contact is useful. Choose a removable mat when the display changes locations often and avoiding an attached pad matters more than hiding the material.
Do not compare products by the word “non-slip” alone. The meaningful details are dimensions, surface compatibility, adhesive or non-adhesive construction, care instructions, and how the complete sign behaves in its actual work zone.
Who should skip this category
- Skip add-on pads when the sign base rocks because it is warped, cracked, missing a factory foot, or assembled incorrectly; address the holder itself.
- Skip adhesive-backed pads when the base or counter maker warns against the adhesive or when residue would be unacceptable.
- Skip a raised pad layout that leaves the sign tilted, concentrates pressure at one edge, or exposes pads beyond the footprint.
- Skip the tabletop location when routine customer, staff, cleaning, or cable contact repeatedly knocks the sign; move it or use a more suitable holder.
- Skip general accessory advice for food-contact, heated, wet, exterior, electrical, accessibility, or other regulated placements; follow the responsible requirements and qualified guidance.
Related choices
Use the sign mounting and display supplies guide when the broader support method is still unsettled. If the base itself is undecided, compare tabletop sign stands by footprint, sign fit, angle, and update access. For a small holder that gets bumped often, compare a clip-on holder with a weighted base. If the insert needs two viewing directions, use the double-sided counter-sign holder guide. Continue with small-business sign planning to match the display to its message and work zone.
The practical bottom line
Start with the holder underside and counter finish, not a generic promise of grip. The right pad fits fully beneath the base, keeps the sign level, follows the stated surface guidance, and remains manageable through cleaning and insert changes. Test one complete setup before standardizing it across a counter or location group.