 The Good Sign Company
Changeable Bin Label Guide
Best label holders for storage bin signs.
A useful bin label stays visible when the tote is shelved, lets the insert change at the pace of the contents, and attaches to the actual bin—not an imagined flat surface. Start with the lip, handle, texture, curve, and available label area, then choose a holder format that matches how often the storage system changes.
Disclosure: As an Amazon Associate, we may earn from qualifying purchases and approved partner referrals.
Best starting route
Match the holder to one sample bin first.
Measure the usable front area and every lip or handle the holder must clear. Compare the listing's attachment method, insert dimensions, stated surface or edge compatibility, pack count, and instructions. Buy enough for a small trial before standardizing a whole shelf.
Best label-holder formats by bin and update pattern
These are category fits, not named winners or hands-on rankings. Product dimensions and compatibility vary, so confirm the current listing before buying.
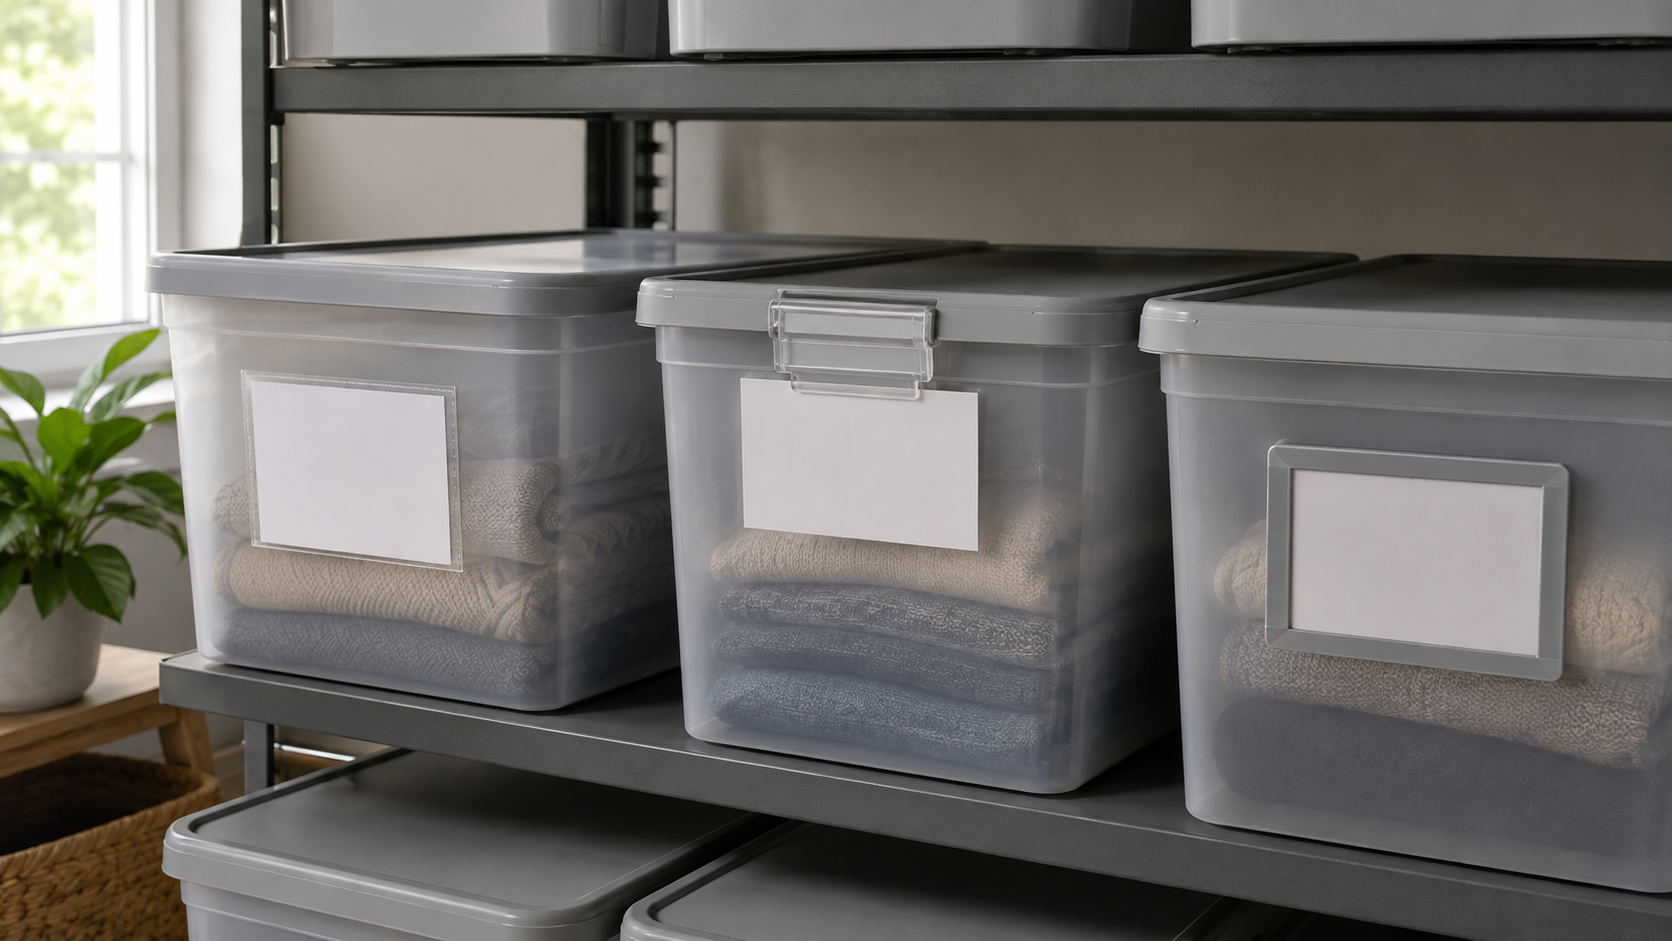
- Clip-on holder: best for a compatible open lip and frequent changes. It can move with the bin and avoids bonding to the face. Measure lip width, thickness, shape, and nearby lid clearance; a clip designed for one edge profile may not seat on another.
- Clear adhesive sleeve: best for a broad, smooth face. A side- or top-loading pocket keeps a paper insert contained and easy to replace. Confirm the documented surface, sleeve size, loading opening, application directions, and removal guidance.
- Rigid adhesive frame: best for a crisp, fixed label zone. A framed insert can be easy to scan on matching bins, but it needs enough flat area and may project farther than a sleeve. Check corners, handles, nesting, and shelf clearance.
- Handle-hanging tag: best when the bin face is curved or textured. A tag can use an existing handle without relying on adhesive. Verify the loop or fastener, dangling clearance, orientation, and whether the tag remains readable when bins sit close together.
- Magnetic holder: best only for a confirmed magnetic surface. This can fit metal cabinets, drawers, or compatible bins—not ordinary plastic totes. Test the actual surface and holder before planning the system, then use the magnetic sign pocket worth-it guide to check whether the update frequency and insert workflow justify buying one.
Seven checks that matter more than pack size
- Attachment geometry: trace the bin's front, lip, handle, lid, and shelf edge. Note curves, ribs, texture, and moving parts.
- Insert dimensions: compare the visible window as well as the paper size. A large card can still have a small readable area behind a frame.
- Reading angle: test the proposed type from the normal standing or seated approach while the bin is fully shelved.
- Update frequency: favor an accessible loading edge or removable clip when contents change often; reserve fixed labels for stable categories.
- Handling path: make sure hands, neighboring bins, lids, and shelf edges do not repeatedly catch the holder.
- Cleaning routine: follow the holder and bin makers' care instructions. Do not assume a sleeve, adhesive, or printed insert tolerates every cleaner.
- System consistency: use one label position, card size, type style, and wording pattern so the shelf can be scanned quickly.
Run a one-bin fit test
Make a full-size paper rectangle using the holder's listed outer dimensions and tape it lightly in the proposed location only if that temporary method is appropriate for the surface. Load the bin, place it on the real shelf, open the lid or handle, and remove neighboring totes. This checks space and visibility; it does not prove that an adhesive or clip is compatible.
Next, print a sample insert with the longest category name you expect to use. View it from the aisle or doorway, then try replacing it without unloading the shelf. Standardize only after the holder remains readable, accessible, and out of the handling path.
Label wording that keeps the system useful
- Use a concrete category such as “winter gloves” instead of a vague label such as “miscellaneous.”
- Keep related bins grammatically consistent: category names on every bin, not a mix of names, instructions, and owners.
- Put secondary detail on a second line only if it remains readable in the holder's visible window.
- Use icons or color as a backup cue, not the only cue, when multiple people use the storage area.
- Leave blank replacement cards near the bins so relabeling happens when contents move.
Who should skip these label holders?
- Skip a purchased system when removable paper cards in an existing bin slot already stay readable and secure.
- Skip adhesive holders when the bin face is strongly textured, sharply curved, frequently flexed, or outside the holder maker's stated surface guidance.
- Skip clip-on holders when the lid, handle, shelf, or stacking pattern contacts the clip.
- Skip a large pack until one holder has been checked on every bin style in the set.
- Skip this household and small-workspace guide for hazard labels, emergency information, regulated inventory, or workplace labeling requirements; follow the applicable rules and qualified guidance.
The practical bottom line
The best storage-bin label holder fits the real edge or surface, presents a large enough insert at the normal viewing angle, and makes updates easier than ignoring an outdated label. Measure one bin, trial one holder, test the longest wording, and then repeat a consistent system. If the bigger problem is choosing signs and labels across a working room, continue with the craft-room sign guide.