 The Good Sign Company
Vendor-table elevation buying guide
Best display risers for tabletop signs
The best riser is the lowest platform that lifts an already stable sign above the products blocking its message while keeping the complete sign base inside the riser's usable top. Start with the aisle sightline and the sign's existing footprint. Then compare top dimensions, added height, table space, packing volume, finish, and how the combined setup behaves during normal service.
This is an elevation guide, not a substitute for a holder or stand. If the sign does not support itself securely on the table, choose a suitable tabletop sign stand before adding height beneath it.
Disclosure: As an Amazon Associate, we may earn from qualifying purchases and approved partner referrals.
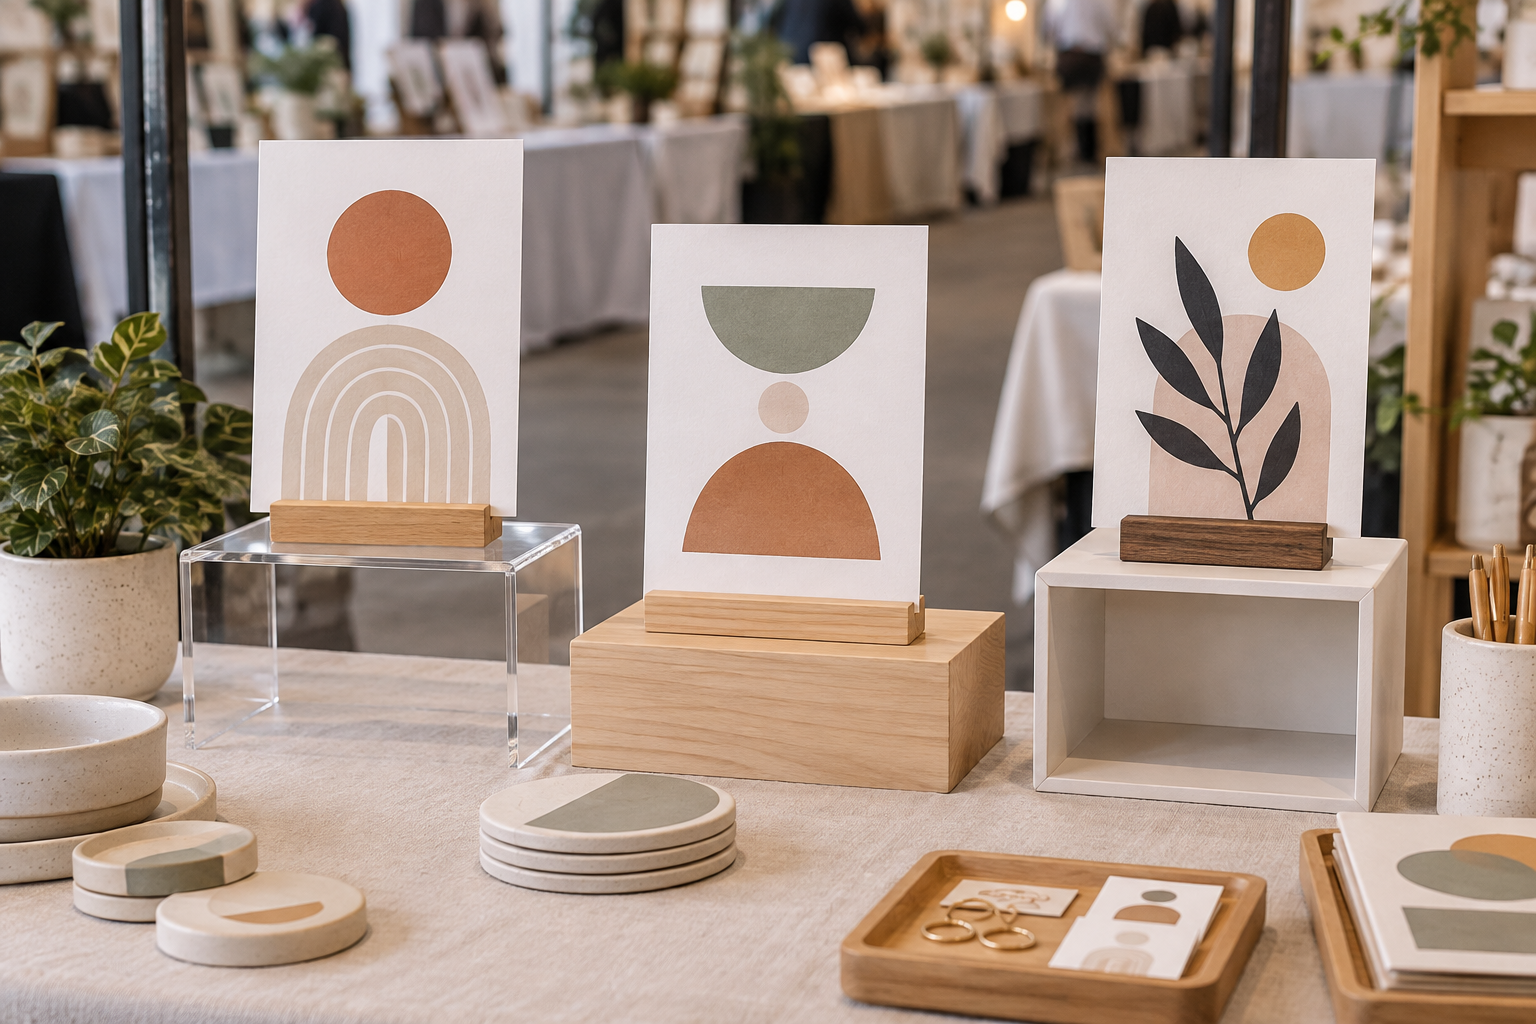
Compare riser formats after measuring the sign base
Use the maker's current dimensions and intended-use guidance. Verify usable top area, outside footprint, height, material, care, and whether pieces nest or stack; a category name alone does not establish fit or stability.
Best riser format by display job
These are fit-based categories, not named winners or hands-on rankings.
- Clear acrylic bridge riser: best when visual weight should stay low. It can lift a small sign without adding another strong color block. Check the full top surface, edge position, reflections, scratches, and current care instructions.
- Solid wood block riser: best when a compact platform should visually anchor the sign. The opaque mass can separate a pale sign from a busy table, but it may compete with merchandise or consume packing space.
- Hollow nesting box riser: best when several elevations must pack together. Box forms may nest or carry small display items during transport. Verify the actual opening, wall thickness, top dimensions, and permitted orientation rather than assuming every hollow riser can be inverted.
- Stepped riser: best for a coordinated sign-and-product grouping. Separate levels can create order, but the sign needs one uninterrupted landing large enough for its complete base. Avoid placing a base across two different heights.
- Low wide platform: best when only a modest sightline correction is needed. It is often easier to integrate than a dramatic pedestal. If the message is still hidden, move it toward the aisle or choose a taller sign format instead of stacking improvised platforms.
Measure the base, top, and table as three different rectangles
Record the sign holder's maximum width and depth, including feet, rear braces, angled supports, and any insert that projects beyond the base. Record the riser's usable top separately from its outside dimensions; rounded corners, raised edges, openings, or a sloped surface can reduce the landing area. Finally, trace the complete riser footprint on the table plan.
Keep the whole sign base on one level surface with margin around its edges. Do not assume that an overhang, narrow contact point, adhesive, or hidden fastener will correct a poor dimensional match. When manufacturer guidance does not clearly cover the intended setup, choose a larger platform or keep the sign directly on the table.
Choose height from the reader's approach
- Set up the actual tablecloth, merchandise, trays, payment equipment, and packaging.
- Place a full-size paper sign in its intended holder.
- Raise it on sturdy mockup boxes at several measured heights while someone observes from the normal aisle approach.
- Choose the first height that clears the important obstruction without hiding products or creating a visually top-heavy display.
- Repeat the check from both ends of the aisle and from the checkout position.
A riser improves a blocked sightline; it does not make small type readable from farther away. If the key message still cannot be read, shorten the message, enlarge the sign face, or move the sign closer to the decision point.
Test the whole setup, not the empty riser
Assemble the exact sign, holder, insert, and riser on the intended table. Gently perform normal nearby tasks: remove merchandise, pass a bag, operate the payment area, and adjust the tablecloth. The purpose is to find conflicts, not to assign an unsupported weight or stability rating. If routine activity brings hands, sleeves, products, or cables into the platform, change the layout.
Do not create height by stacking unrelated trays, cartons, or several loose risers unless the maker explicitly describes that arrangement. Keep the setup away from table edges and customer reach paths. For outdoor events, elevated displays introduce wind and weather questions beyond this indoor guide; follow the product maker and event organizer for the actual conditions.
Plan finish, glare, cleaning, and packing
- Clear acrylic: check reflections against windows and overhead lights, and follow the maker's cleaner guidance.
- Wood: compare its tone with both the sign and table covering; confirm finish care rather than assuming stain or moisture resistance.
- Painted or wrapped boxes: inspect edges and corners after packing, and keep repair materials separate from products.
- Nesting sets: verify that the pieces genuinely nest in the orientation you intend and that the sign base fits the specific size you will use.
- Transport: assign each riser a place in the booth kit so loose platforms do not rub against sign faces or clear holders.
Who should skip display risers?
- Skip a riser when the sign already clears the products from the real viewing path.
- Skip it when the riser and sign base together take space needed for merchandise, payment, packing, or customer interaction.
- Skip elevation when the message itself is too long, too small, or too low-contrast; fix the sign design first.
- Skip a platform whose usable top cannot contain the full base with a sensible margin.
- Skip a tall tabletop arrangement when the message belongs on a venue-approved banner or hanging sign above the booth.
- Skip the purchase until the full setup can be mocked up and packed with the real event kit.
Bottom line
Choose clear acrylic when you want less visual mass, a solid wood block when the platform should feel anchored, a nesting box when packing efficiency matters, or a stepped format when one coordinated product grouping needs several levels. The deciding measurements are the sign's complete base, the riser's usable top, the added height required to clear real obstructions, and the footprint left for selling and service.
Continue with the tabletop signs for vendor booths guide to refine the message and sign format, or use the small-business sign planning pillar to map sightline, placement, and next action before buying display hardware.