 The Good Sign Company
Tabletop display comparison
Acrylic card holder vs wire card stand: which fits a small printed sign?
Choose an acrylic card holder when a thin paper insert needs broad support, a defined viewing face, and some protection from routine handling. Choose a wire card stand when the card is already stiff, exposed edges suit the look, and compact storage matters more than a clear front panel.
Neither format is automatically more stable or readable. The finished card, contact points, base footprint, viewing angle, and light around the table decide the fit. Start with the broader tabletop sign stand guide if the display could also be an easel, slotted base, or clip.
Disclosure: As an Amazon Associate, we may earn from qualifying purchases and approved partner referrals.
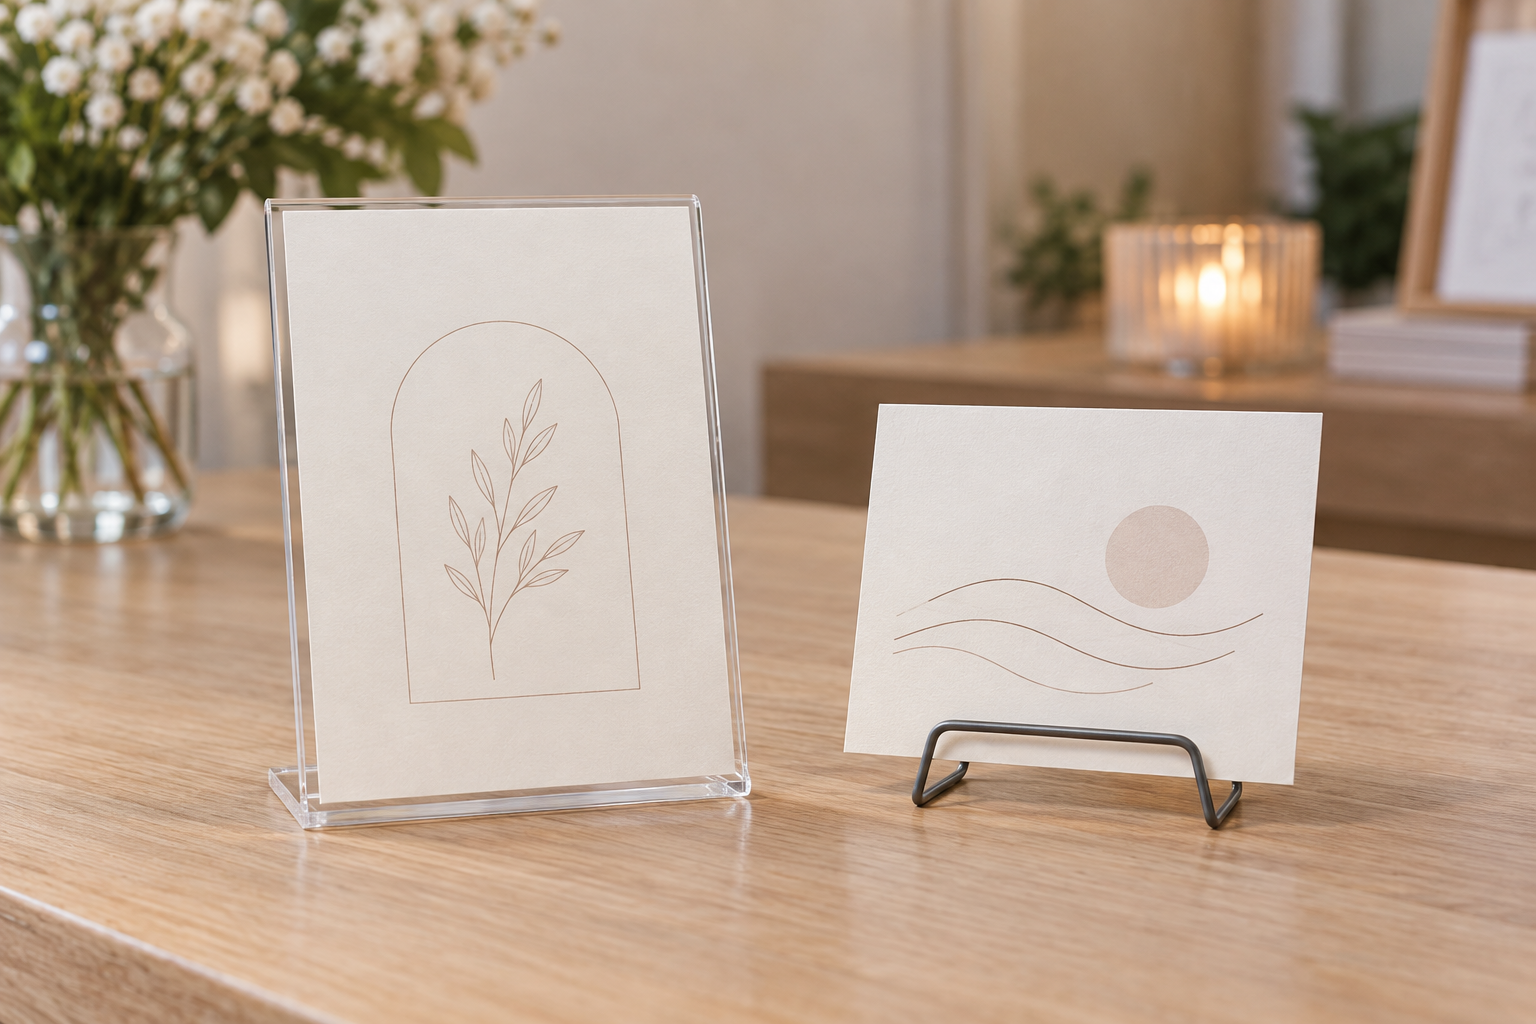
Compare the two formats by the finished card
Check current listings for supported card size and orientation, holder dimensions, base footprint, loading method, contact points, material, cleaning guidance, and included pieces. Do not infer capacity from a styled photo.
Quick comparison
| Decision | Acrylic card holder | Wire card stand |
|---|---|---|
| Card support | Supports much or all of a thin insert, depending on format | Supports at a few contact points; a stiffer card usually presents better |
| Visible surface | Adds a clear face or edges that can reflect light | Leaves most of the card uncovered but makes the wire contact visible |
| Updates | Insert slides into or between panels; access varies by design | Card lifts out of the contact points when clearance allows |
| Storage | Rigid panels and bases need protected packed space | Small stands may nest compactly; verify the actual shape |
| Best first use | Thin printed menus, notices, or place cards needing broad support | Stiff cards or small plaques with intentional exposed edges |
Choose acrylic when the insert needs support
A clear holder is the stronger starting point for ordinary printer paper or another flexible insert. It defines the display angle and keeps the sheet flatter than a few wire contact points can. It also creates a consistent border and can reduce direct handling of the printed face.
The tradeoff is another surface between the reader and the message. Windows, candles, pendant lights, and overhead fixtures can reflect in clear material. Test a full-size mockup from the actual approach rather than assuming transparency means invisibility. Check whether the holder loads from the side, top, or base and leave enough hand clearance to change the card.
Choose wire when the card can stand on its own
A minimal wire stand can keep the card visually prominent and may occupy little packed space. It works best when the card is stiff enough not to curl, sag, or lean around the support points. The lower wire can cross artwork or small type, so place essential information above the contact area.
Wire shapes vary widely. Confirm supported card dimensions, stand depth, contact spacing, and intended orientation in the current listing. A compact silhouette does not prove that a stand will control a tall card, resist a bump, or suit a crowded counter.
Test five details on the real table
- Print the longest message. Use final card dimensions and the smallest planned type, then view it from the normal approach.
- Map the whole footprint. Include angled legs, panel depth, loading clearance, décor, products, dishes, and hand movement.
- Check the sightline. A seated dinner table, standing checkout counter, and low gift table need different angles.
- Recreate the lighting. Look for acrylic reflections and wire shadows crossing the card face.
- Rehearse one update. Replace the insert without moving nearby objects or touching the printed surface more than intended.
Cleaning, handling, and packing
Acrylic faces can show fingerprints, dust, and fine surface marks, while wire joints and bends can collect debris or catch a wiping cloth. Follow the maker’s cleaning guidance and test any cleaner on an inconspicuous area. Do not assume one product suits the holder, printed card, table finish, and nearby décor.
For events, pack the card and holder so rigid edges and metal contact points cannot press into printed faces. Count each stand, insert, and spare card during setup and teardown. Label the storage container rather than marking a visible product surface.
When to skip both
- The message needs to be seen over merchandise, flowers, monitors, or seated guests; use a taller format with documented fit.
- The card changes while someone writes on it; compare a clipboard holder with an acrylic holder.
- The sign is tall, heavy, valuable, powered, or top-heavy and the listing gives no compatible support information.
- The table is outdoors, unstable, or in a busy circulation route. These indoor tabletop categories are not automatic wind, weather, or traffic solutions.
- A venue or workplace rule controls placement or materials; confirm that requirement directly.
Bottom line
An acrylic card holder is usually the more forgiving choice for a thin paper insert and consistent presentation. A wire card stand is a better candidate for a stiff card when visible edges and compact hardware support the design. Buy by verified dimensions and contact geometry, then test one complete setup before ordering multiples.
Continue with the tabletop sign stand guide, compare acrylic holders and wooden slot stands, or plan a larger display with the small-event directional sign guide.